Thursday, March 08, 2007

RIP Keiko (May 1, 1995 - Mar 7, 2007)

Im totally sad. Extremely sad.

Really bummed. Really really bummed.

Got some bad news this morning from my dad. My little baby, my precious little pet pomeranian passed away last night in her sleep. I was hoping to see her at least one more time when I returned to Hawaii this coming April, but her health was failing, and prone to bad asthma attacks. Well, she had a really bad one and it probably ruptured her lungs. Though she acted "normal" she simply went to sleep last night, and went peacefully.

She was the dog I always wanted, in the exact color that I liked, ever since I fell in love with two pomeranians I saw at Kewalo Basin on a school excursion. And when she arrived at the pet store my sister worked at, I knew I had to have her. She was my baby.

Rest In Peace.


Keiko
(May 1, 1995 - Mar 7, 2007)

Monday, March 05, 2007

Another interesting video about Airplanes

We are so used to seeing our everyday airplanes just take off, fly and land, without doing any type of "drastic" maneuvers (ie barrel rolls). We are of the belief that for a commercial airliner, meant to carry passengers, that it would be unrealistic for a plane to do.

Think again


Boeing 707 ... doing a barrel roll. Yes, commercial airliners can do what the smaller guys can.

I want to got to Wellington, NZ

That is , if I get to experience one of these types of landings!


Forget Cedar Point!

Saturday, December 30, 2006

Yard Sticks! How can be so hard to find a yard stick?

Okay, I need to make those infamous collars for an Akatsuki Cloak. OF course, to measure such collars out, it would be good to have a yard stick. Since I moved to the beautiful and sunny California, I left behind my yard stick since, hey I figured, I could get a replacement.

But, oh no. Yard sticks are like trying to find a stinking piece of gold nugget in a stream after panning for 10 hours straight.

There is no store near me that carries yard sticks! Can you freaking believe that? I drove down to WalMart...nope. They've been out of yard sticks since I moved here back in August. Went to Target...nope dont even carry such things. Home Depot...nada...

I drove over 30 miles trying to locate a store that carries yard sticks!!!

WHAT is wrong with this state???

Tuesday, November 07, 2006

Prop Making - Thermal Adhesives are cool!

In my current project, I am recreating a costume that I loved, and although I addressed these steps in that ongoing update of that blog article, I decided to seperate out the prop making part from the rest so that way it would be easier to follow.

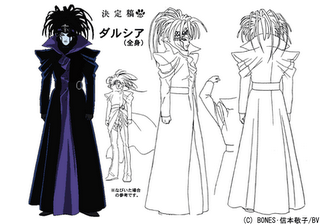
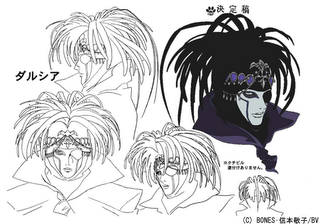
For this project, I am recreating the headpiece that the character of Darcia from Wolf's Rain wears as part of his costume. In doing so, I decied to sculpt the pieces needed to complete the main part of this project. So lets get right to it. Remember, you can click on the images within this post to see a more detailed version.


Supplies


Clay
Sculpting Tools
Plaster of Paris
Clean Water
Gloves
Stir Stick
Clean Bowl
Hot Glue Gun
Glue Sticks


Step 1: Sculpting


Using oil based clay, I sculpted the main part of the headpiece. You'll want to use oil based clays since they are easier to work with and do not dry out easily. For this, I bought clay from the website : Monster Makers. This particular clay requires you to heat it up. Although it stated to put the clay into an oven and "bake" it on low heat, a good heat gun or a blow dryer is just enough heat to get it easy to mold.


Now that I've sculpted the main piece, I also sculpted the jewel holders as well. Sorry that I dont have images of it, but its just a teardrop sculpt.


Step 2: Preparing to Make the Negative Cast


Once I've done my sculptures, its time to prep them for the casting. First, you'll want to create a wall around your sculpts so that you can contain the plaster when you pour it on the sculpts. Prep your sculpts by using a blow dryer or heat gun and blow the hot air over the clay. This will bring up the oils within the clay, so that when you do pour the plaster, the plaster wont stick directly to the sculpt. This will help later when you try to remove the clay from the negative casts.


Follow the instructions for the plaster that you buy. I suggest that you use UltraCal 30 as that is a strong and easy to mix plaster. Since Im cheap, I just picked up a bucket of Plaster from a hobby store. Make sure you wear gloves and cover anything that you don't want any spillage or drippings to touch. So, get your plaster mixing supplies together. Always used clean water and bowls.


Mix up the plaster until you get a nice consistency. It should be like room temperature Ice cream.


Once you've mixed up your batch of plaster, pour them into the neat little wells around your sculpt. You want to fill the entire well so that you have a strong casting of your sculpts.


Now, you play the waiting game. Wait at least the recommended amount of time on the plaster you use. The type I used stated that it would take 25-30 minutes to dry completely. I decided to give it an extra hour to do so. Once done, your sculpts are basically destroyed when you remove the clay from your negative cast.


Voila! Your negative casts are done. It's time to move on to make cast your accessories.


Step 3: Casting with Thermal Adhesives


So what are thermal adhesives? Basically, its Hot Glue. If you've ever done arts and crafts before, you'll be familiar with them, but for those who never used them before, you can stop by your favorite hobby store or Walmart and pick up a Hot Glue gun for cheap.


I suggest that you stay away from the Mini Glue gun types, as you'll quickly find out that you will be using a lot of glue sticks if you do. The Standard glue gun and sticks are what you want. And make sure your Glue gun states that its mult-temp or HIGH temperature. The low temperature type, you'll have glue melting on by simple body heat. If you like this method, I suggest picking up a more "commercial" type along with the sticks as well. Home Depot or Lowes will carry these types of guns.

Now onward. Taking the negative casts you made in Step 2, you'll now soak them in water for about an hour. This will let the plaster soak up the moisture so that the thermal adhesive will not stick to your plaster, thereby ruining both the accessory you are trying to make and the negative cast.


Once done, dry them with a clean cloth. You don't want any water on your negatives as that will adversely affect the glue when you start injecting it into the mold.

Get your glue guns out.


Once they are nice and hot (be careful now, you dont want to burn yourself) you'll want to inject the glue right into the mold. If there are crevices, stick the tip of your glue gun right into them and squeeze the glue into the mold. That way, you dont end up with uneven edges on your casts.


Fill the mold up with glue. Don't worry about it overflowing the edges. You want to make sure that your casting is solid.


What is nice about using this method to cast your accessories, is that wait time for the glue to dry and harden somewhat is next to nothing. At most, you wait 10 minutes for the glue to cool down enough for you to remove from the mold.


And you can continue to use the same mold to make more castings.


As you can see, the edges are a bit rough, so you'll have to trim the extra "glue" around your casting. You can use an exacto knife or a hot knife (hobby stores carry these) to do so. Once you've cleaned up the edges, you can move on to painting them.

Step 4: Painting


First off, you'll want to spray a light base coat of primer. This will also help you to see any flaws within your cast that you can easily repair with hot glue. If you see holes within your cast just use a mini-hot glue gun and fill the holes in. The primer will help you to see where you can fill in or add to your cast.


Once you've done your patching or you are satisfied with how your casting looks, go ahead and spray your cast with the color you want.


Remember to let an adequate amount of drying time so that the paint sets. Once they are dry, you are ready to assemble your accessory, or if your accessory is only one piece; YOU'RE Done

Here is what the headpiece looks like assembled together


Hope that this tutorial helped you. Im always looking for ways to make it better.

Thursday, October 19, 2006

Darcia (Wolf's Rain) Ver. 2
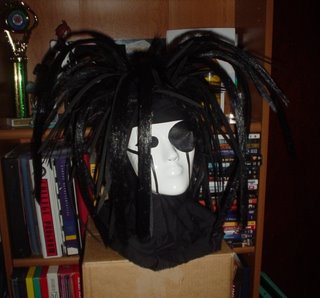
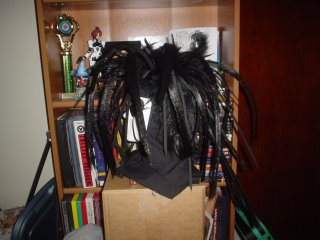
I just thought that it would be fun to share what Im going through at the moment to improve on one of my all time favorite costumes. Im always of the feeling that I can always do better, so Im in the process of working on improving this costume. Throughout this blog, just click on the images you see to see a bigger version.

If you dont know who Darcia is or what he looks like in his costume:


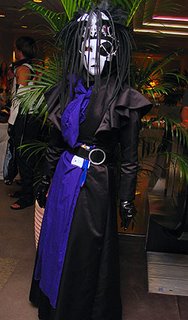
For this one, I am completely redoing the entire outfit, including his coat. Some of you remember me from Kawaii Kon 2005


I always felt that I didn't like the way my original wig turned out. It didn't have that "body" that is apparent in the anime or the images of him, so after fiddling around, I finally decided to do something about it.

In this post, I'll go through the process in which I am attempting to make the wig better, and later through the rest, I'll even describe how I am redoing the coat and the headdress he wears.

So first off, the wig.

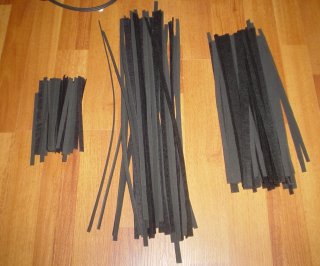
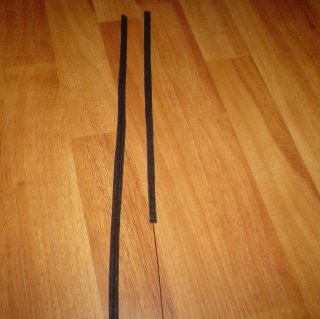
This time, I decided to go with what I had originally done, cutting 1/4" strips of Stiffened Black Felt.


There are three sizes that I plan on working with. The full 14" length (that the stiffened felt comes in). The 9" length (which is the other way the stiffened felt was cut) and 1/3 of 14" pieces. The 14" and 9" lengths will all be wefted together with strips of extension hair. The smallest pieces will just be added to the wig to give it more texture and depth.
Also, I am using 22 guage Floral Wire, that I spray painted black:


Now with both felt and wire ready, I sewed the wire to the felt so it can give it strength:


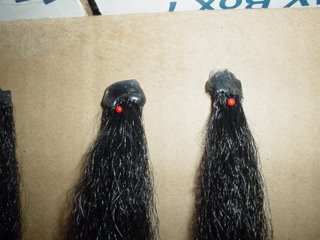
Once done, I took wefts of extension hair and hot glued the tips to the wired felt:


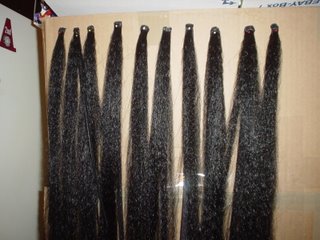
So, soon, I'll have a bunch of wefts stuck to a cardboard box in my kitchen:


(make note, Dani, buy a lamp for your living room so you can do this there instead of the kitchen)

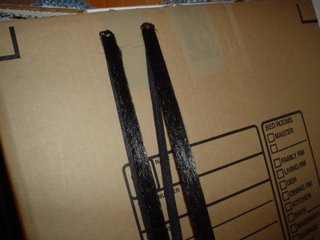
Once the wefts are ready, I took the Got2b Glued hairspray and began spraying and blowdrying the wefts so they would hold their shape and be stiffened:


I highly recommend this hair product for any type of spiking, wefting, or sticking hair to some other object. Its a miracle worker.

Now the wefts are ready, time to sew them into the wig:


Side view:


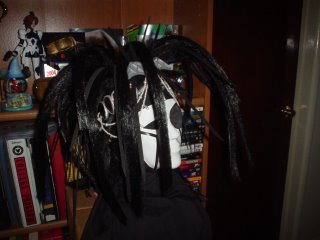
Once sewn in, you can see from the photos above that I already am attempting to give them the curved looked as referenced from his images above. I've only sewn in a few, but I am pinning the rest of the wefts into place so that I can guage to how much wefts I'll need to make, of which size and where the smaller strips of felt will go once the bulk of the hair is sewn in.

As it is now, its a work in progress, but keep visiting as I continue to add to this project.


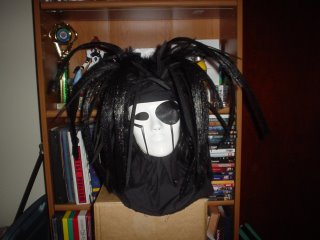
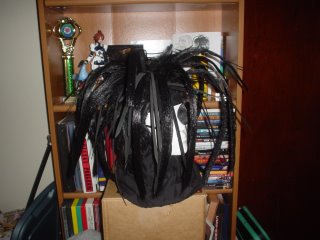
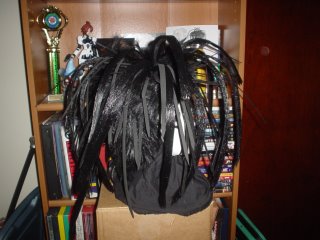
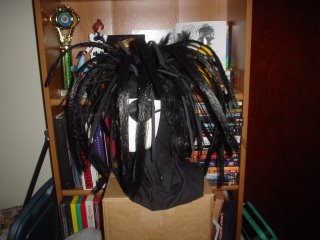
Update: Well, after 24 hours of wefting, sewing, and hot-gluing and hair spraying, I've managed to finish this little recreation. Below are the images of the completed wig.


Update: I've edited this blog so that you can see how to cast the accessories in the Nov. 2nd post. Please view that post as to how to make your own accessories by using Hot Glue (Thermal Adhesives).


Update: After painting the castings for the headpiece, I assembled the accessory together. So here it is , Darcia's head....


Tuesday, October 03, 2006

AWA 12 Atlanta Georgia

I had the pleasure of attending AWA this year, as I wanted to experience what a "mainland" convention would be like, since the last one I attended was AnimExpo way back in the 90's (then, the total attendance was like 5,000 visitors). Struggling to find a room, I had the pleasure of sharing a hotel room at the Waverly, where the Convention was held, with a couple of Canadians, who were as friendly as they can be! So, this is a shout out to them, for letting me camp out . To Kevin and Vessa, much mahalos!

What was nice was that I was able to see how a bigger convention than Kawaii Kon is run and the different panels they had going. Interesting enough, the Waverly and the Cobb Galleria Center was mind numblingly huge. So, Kawaii Kon is definitely going to improve when it is held in the Hawaii Convention Center next year.

I also had the pleasure of meeting up with Michael Sinterniklaas again. Last I spoke with him, he was celebrating his birthday (Happy Birthday dude!) in California, and I had just missed his visit by only a week. So it was great to see him there (and get a really big hug from him). He's still as funny as ever!

Oh and I can't forget Jennifer Sekiguchi! It was awesome to catch the premiere of Paradise Kiss with her, since she directed the dubbing for it. Great job, girlfriend!

Okay now to the pics. Im only post a few, since I dont want to weight down with the load times!


Thursday, September 14, 2006

California DMV Fun! - So what Vanity plate should I get?

Well, I went into the Torrance DMV to finally get my California Driver's License. Studied their handbook the night before. And prepared to be faced with waiting to stand in long lines to get my license.

I only had to wait 15 minutes, but then it took three hours to finish all that I needed to do. Word of note, if moving from out of state, contrary to what is on the CA DMV website, get a smog check done for your car! I had to leave the DMV for a bit to go get a smog check.

Written test for the DL was easy. The only thing I missed was the specific form you had to fill out (and TURN in yourself - the police wont do it), if you're involved in an accident that has less than $750 worth of damage to either party. Other than that, piece of cake.

So now I'm licensed in California to ride a motorcycle and drive a car! BTW, for those of you who think that Registration fees in HAWAII were expensive, think again. My reigstration fee for my car in HI with a VANITY plate was only $180. Here, its $200 without a vanity plate. Great. In the space of two months, I've spent $380 on just registration alone. EEK. Add on the $45 per year smog check fee, and well, its just hella more expensive to drive here. I've yet to see what insurance is going to cost me.

So, once my mortorcycle gets here, what vanity plate should I get? The one I used in Hawaii (and happily handed over to a DC Gal), is already taken and every variation I can think of is taken. So I need suggestions. What kind of vanity plate should I get?

Im a chick (duh)
I ride a 2005 Yamaha R6
I like to drag race (and will be looking into it doing that here)

Anything else you need to know? Just post a comment..

Thanks all