For this project, I am recreating the headpiece that the character of Darcia from Wolf's Rain wears as part of his costume. In doing so, I decied to sculpt the pieces needed to complete the main part of this project. So lets get right to it. Remember, you can click on the images within this post to see a more detailed version.
Supplies
Clay
Sculpting Tools
Plaster of Paris
Clean Water
Gloves
Stir Stick
Clean Bowl
Hot Glue Gun
Glue Sticks
Step 1: Sculpting
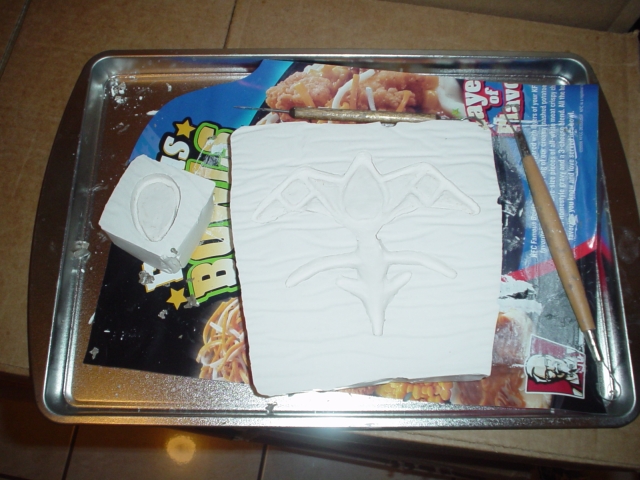
Using oil based clay, I sculpted the main part of the headpiece. You'll want to use oil based clays since they are easier to work with and do not dry out easily. For this, I bought clay from the website : Monster Makers. This particular clay requires you to heat it up. Although it stated to put the clay into an oven and "bake" it on low heat, a good heat gun or a blow dryer is just enough heat to get it easy to mold.
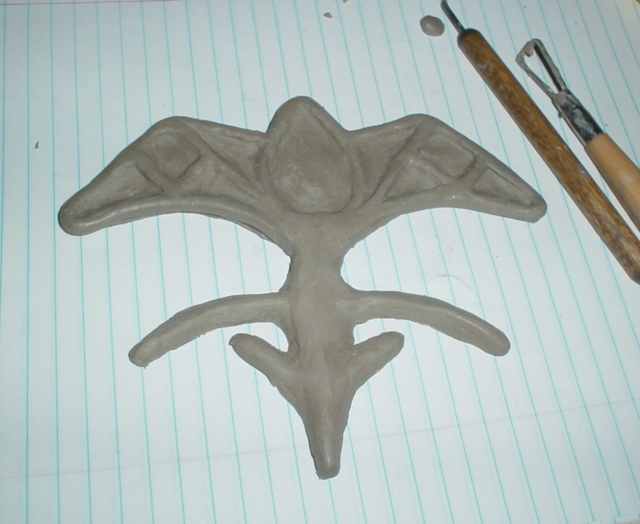

Now that I've sculpted the main piece, I also sculpted the jewel holders as well. Sorry that I dont have images of it, but its just a teardrop sculpt.
Step 2: Preparing to Make the Negative Cast
Once I've done my sculptures, its time to prep them for the casting. First, you'll want to create a wall around your sculpts so that you can contain the plaster when you pour it on the sculpts. Prep your sculpts by using a blow dryer or heat gun and blow the hot air over the clay. This will bring up the oils within the clay, so that when you do pour the plaster, the plaster wont stick directly to the sculpt. This will help later when you try to remove the clay from the negative casts.

Follow the instructions for the plaster that you buy. I suggest that you use UltraCal 30 as that is a strong and easy to mix plaster. Since Im cheap, I just picked up a bucket of Plaster from a hobby store. Make sure you wear gloves and cover anything that you don't want any spillage or drippings to touch. So, get your plaster mixing supplies together. Always used clean water and bowls.
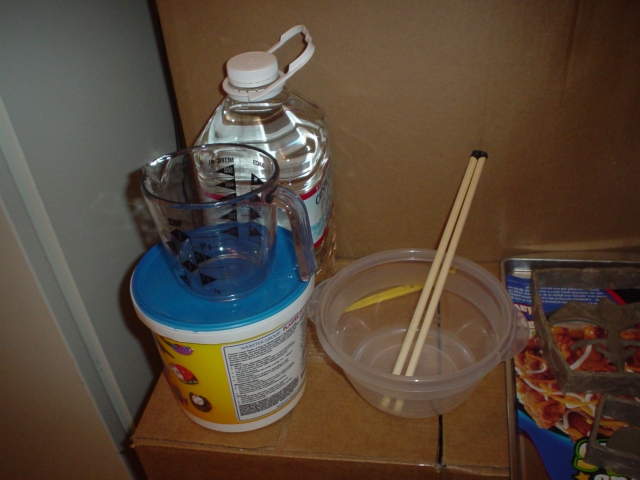
Mix up the plaster until you get a nice consistency. It should be like room temperature Ice cream.

Once you've mixed up your batch of plaster, pour them into the neat little wells around your sculpt. You want to fill the entire well so that you have a strong casting of your sculpts.
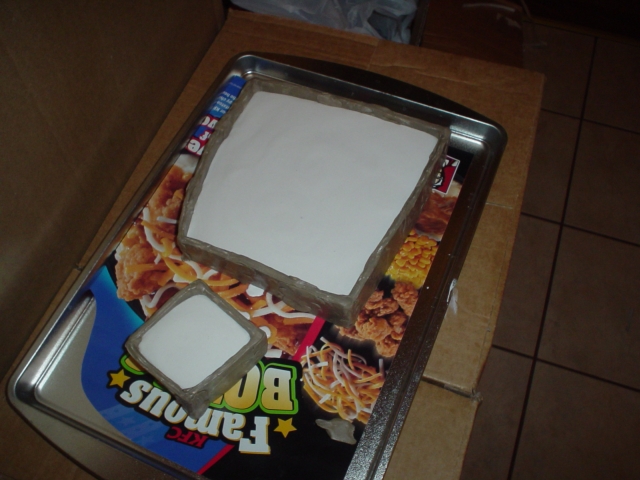
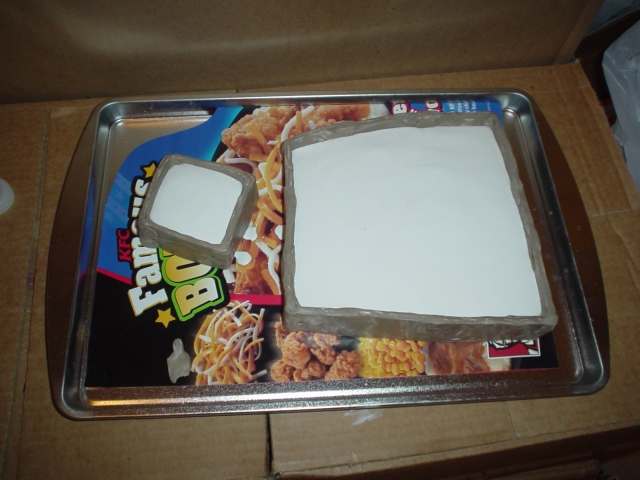
Now, you play the waiting game. Wait at least the recommended amount of time on the plaster you use. The type I used stated that it would take 25-30 minutes to dry completely. I decided to give it an extra hour to do so. Once done, your sculpts are basically destroyed when you remove the clay from your negative cast.
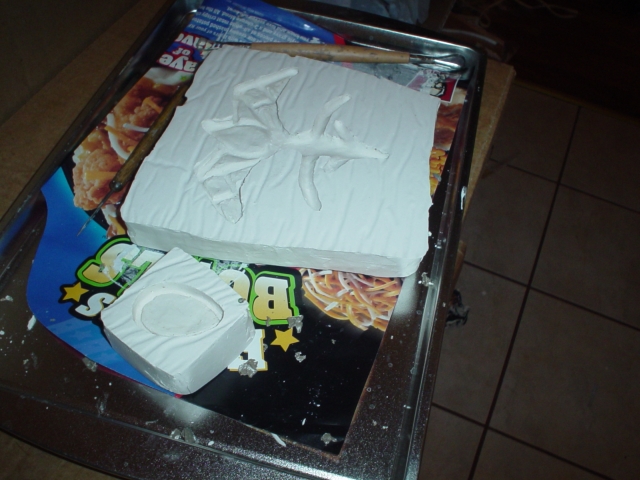
Voila! Your negative casts are done. It's time to move on to make cast your accessories.
Step 3: Casting with Thermal Adhesives
So what are thermal adhesives? Basically, its Hot Glue. If you've ever done arts and crafts before, you'll be familiar with them, but for those who never used them before, you can stop by your favorite hobby store or Walmart and pick up a Hot Glue gun for cheap.

I suggest that you stay away from the Mini Glue gun types, as you'll quickly find out that you will be using a lot of glue sticks if you do. The Standard glue gun and sticks are what you want. And make sure your Glue gun states that its mult-temp or HIGH temperature. The low temperature type, you'll have glue melting on by simple body heat. If you like this method, I suggest picking up a more "commercial" type along with the sticks as well. Home Depot or Lowes will carry these types of guns.
Now onward. Taking the negative casts you made in Step 2, you'll now soak them in water for about an hour. This will let the plaster soak up the moisture so that the thermal adhesive will not stick to your plaster, thereby ruining both the accessory you are trying to make and the negative cast.

Once done, dry them with a clean cloth. You don't want any water on your negatives as that will adversely affect the glue when you start injecting it into the mold.
Get your glue guns out.

Once they are nice and hot (be careful now, you dont want to burn yourself) you'll want to inject the glue right into the mold. If there are crevices, stick the tip of your glue gun right into them and squeeze the glue into the mold. That way, you dont end up with uneven edges on your casts.
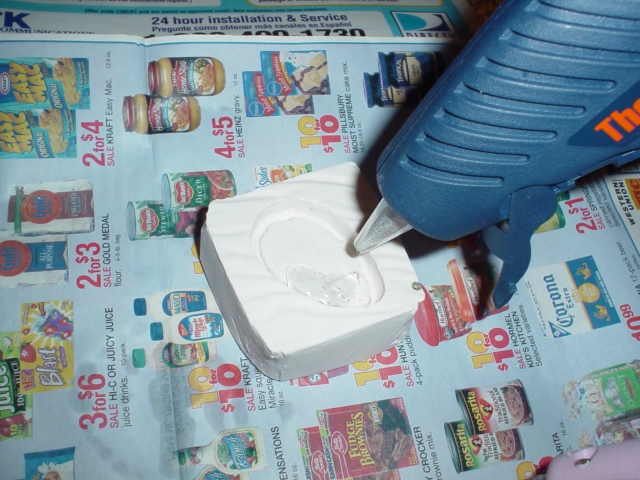
Fill the mold up with glue. Don't worry about it overflowing the edges. You want to make sure that your casting is solid.

What is nice about using this method to cast your accessories, is that wait time for the glue to dry and harden somewhat is next to nothing. At most, you wait 10 minutes for the glue to cool down enough for you to remove from the mold.
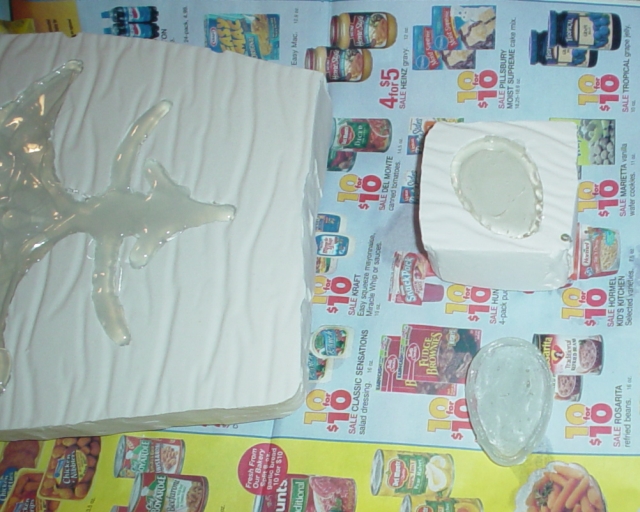
And you can continue to use the same mold to make more castings.
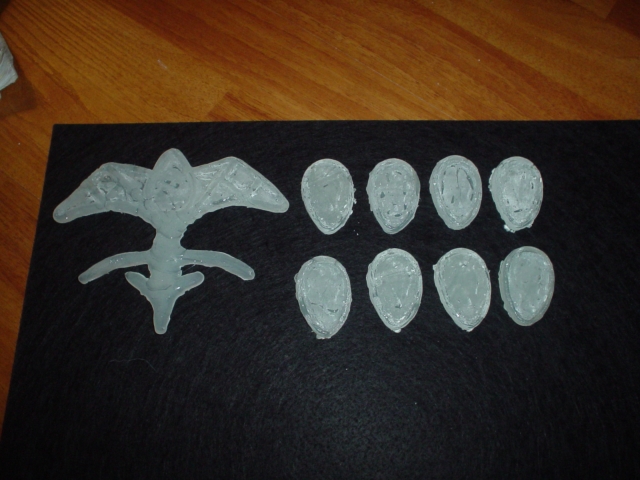
As you can see, the edges are a bit rough, so you'll have to trim the extra "glue" around your casting. You can use an exacto knife or a hot knife (hobby stores carry these) to do so. Once you've cleaned up the edges, you can move on to painting them.
Step 4: Painting
First off, you'll want to spray a light base coat of primer. This will also help you to see any flaws within your cast that you can easily repair with hot glue. If you see holes within your cast just use a mini-hot glue gun and fill the holes in. The primer will help you to see where you can fill in or add to your cast.
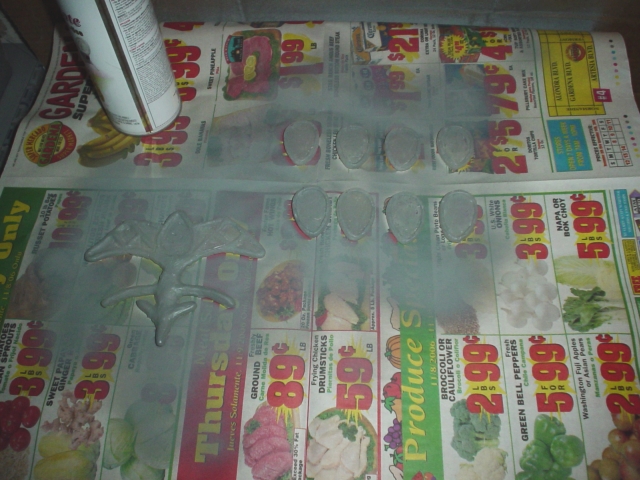
Once you've done your patching or you are satisfied with how your casting looks, go ahead and spray your cast with the color you want.

Remember to let an adequate amount of drying time so that the paint sets. Once they are dry, you are ready to assemble your accessory, or if your accessory is only one piece; YOU'RE Done
Here is what the headpiece looks like assembled together

Hope that this tutorial helped you. Im always looking for ways to make it better.

3 comments:
I realize this is somewhat of an old post, but I was contemplating doing this for parts of my cosplay and had a few questions about the process.
First of all, what type of spray paint did you use? It doesn't state in the tutorial if you need a special type or if the primer is enough to make any kind acceptable. Also, how heavy are the pieces once they are done? The headpiece seems to have used quite a bit of hot glue for it, how heavy did it end up being?
Thanks for this tutorial, it was very helpful.
Two questions:
1- Is this flexible? I'm trying to make arm-bands. Would it work a bit like wonderflex at this point? I was thinking of making them flat and using a blow dryer to mold it into a round shape.
2- Can this hold up to Otakon heat (very hot and humid, and long periods of time waiting outside)?
I've always had a great love for Japanese Cosplay and a great love of Cosplay Costumes, so for me it's about bringing these charcters to life by recreating their Cosplay Sale. Buy Cosplay costume wearable and practical as necessaries,especially the hot Naruto Cosplay now.
Post a Comment